So many pieces are off of the car now it looks a lot more like a shapely piece of modern rusted metal art than a car.
I had a lot of help again in pulling off car parts and draining beer containers!
The main objective this week was to get the front bumper pieces and the rocker panels off. Especially the rocker panels, and much of the car's rust damage centers on these areas.
Even with the rocker panels on, just moving or tapping on them caused dirt to fall out of the spaces between the panels and the chassis. I think car companies learned a lot about how to
not build gaps underneath car bodies from cars like this. The rocker panels are riveted to the body on top, with (rusted) screws underneath, with a couple of screws in the front and rear wheel wells. So the first task is removing the wheels to get at those wheel wells.
Here's some dirt that fell just from tapping the rockers and drilling out some rivets...
Here's the passenger seat spot. The seat brackets are rusted out where they connect to the floor. You should see the driver's side...new rear floor pan is readily available online.
The driver side floor pan was already replaced by apparently a complete redneck. Metal plate welded to the spot where the floorpan was, brackets welded on and a brace. Nice!
Here's the driver's side rocker/dirt. You can see bondo/respray in non-matching silver paint on the door jamb area. Nice work Cletus!
Glamor shot of the interior. The floorpan (except for driver's seat area) is covered with about a millimeter thick layer of a tar-like sound-deadening/insulating material. This will have to be scraped off/replaced. Of course they sell pre-cut sheets of replacement tar that will fit exactly after this is all cleaned up and re-painted.
The front bumper trim and valence was removed pretty easily once the wheels were off. And the last bit of carpet in the front trunk.
Those circles in the front are just little plugs that will be removed to allow air to flow to a front-mounted oil cooler when she gets her new heart.
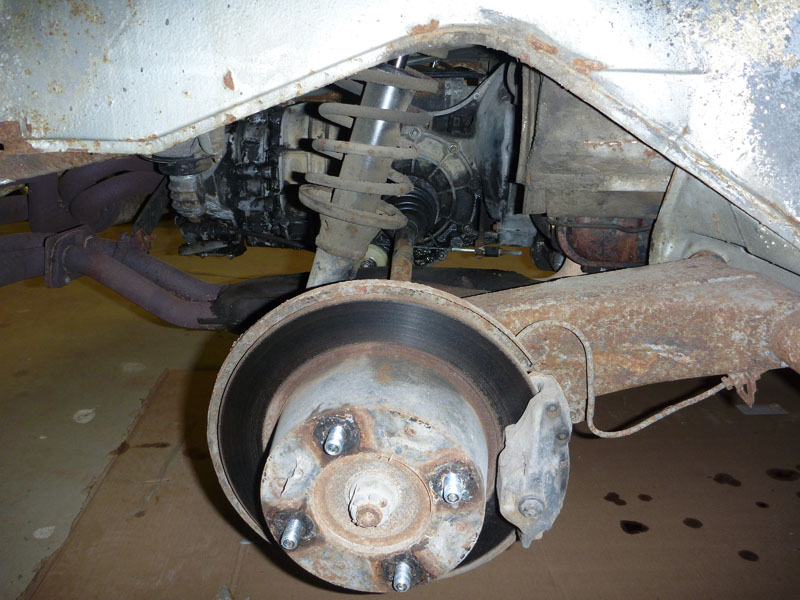
With the rear wheels removed you can see the motor and transmission clearly as well as the rusty suspension arm and exhaust. Lots of vertical clearance is afforded by the bodywork back here. And look - rear disk brakes; not bad for 1972.
Passenger side rear suspension. Note the four-bolt hubs which will be replaced by 5-bolt hubs suitable for larger and nicer 911 wheels, brakes and suspension bits.
Now the UGLY. The passenger side rocker panel space was harboring a solid chunk of dirt between the frame and the panel. No wonder these jack areas just hold moisture and rust out!
It's mostly just surface rust...(only a flesh wound!)
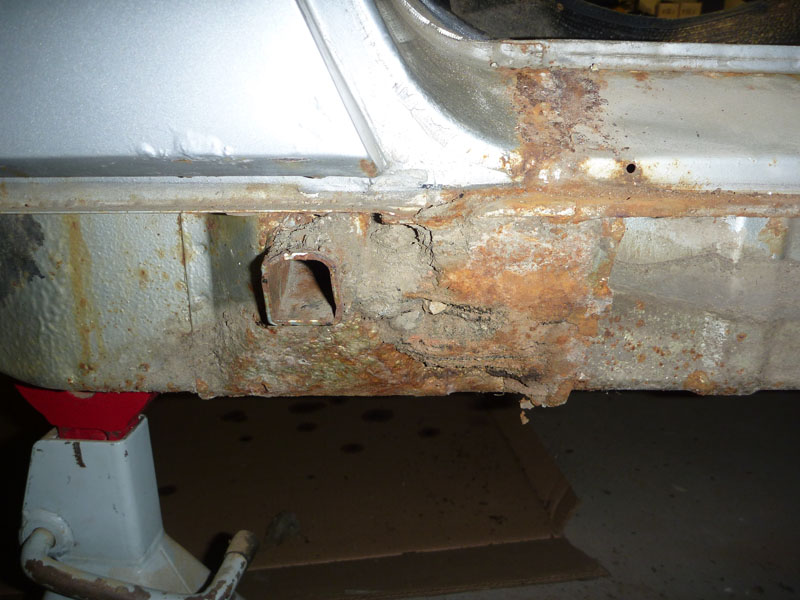
Except for the jack post itself! This is supposed to be a pyramid-shaped metal piece welded to the body with the jack post extending from the top of the pyramid shape. The pyramid just crumbled like dry paper when I touched it with a screwdriver. And yes, perfect new pieces are available for all of the comon rust areas. This ain't new to 914 owners.
Here's a view of the passenger jack post from below. The left is towards the front of the car. You can see the pyramid shape of the jack post support (which looks like bubbling cheese). On the left is a vertical support that was trapping and holding all of the solid dirt between itself and the jack support. On the right is the rusty hole leading directly into the engine compartment/battery area.
It's hard to describe how much dirt was packed in there, even with pictures!
The seat back is now removed along with a thick (about 2mm) rubber-like pad that provided heat- and sound-deadening for the passenger compartment from the engine bay. All of the discoloration is just the glue that held the pad onto the firewall.
We found lots of broken glass back here. No wonder the rear window looks so nice now, it's been replaced!
interior is disappearing!
We removed the engine cover as well. The carburetor air cleaner box makes a great coaster.
I moved the tractor from the front of the shop to the rear so I could store the pieces we're removing from the car in the front of the shop.
It's like a half-century-of-vehicles parking lot up in here.
Here are most of the parts taken off of the car so far.
This post is pretty late as all this work was done last weekend. The next post will be pretty soon as it's the weekend again and more weekend warrior car disassembly will commence!


No comments:
Post a Comment